
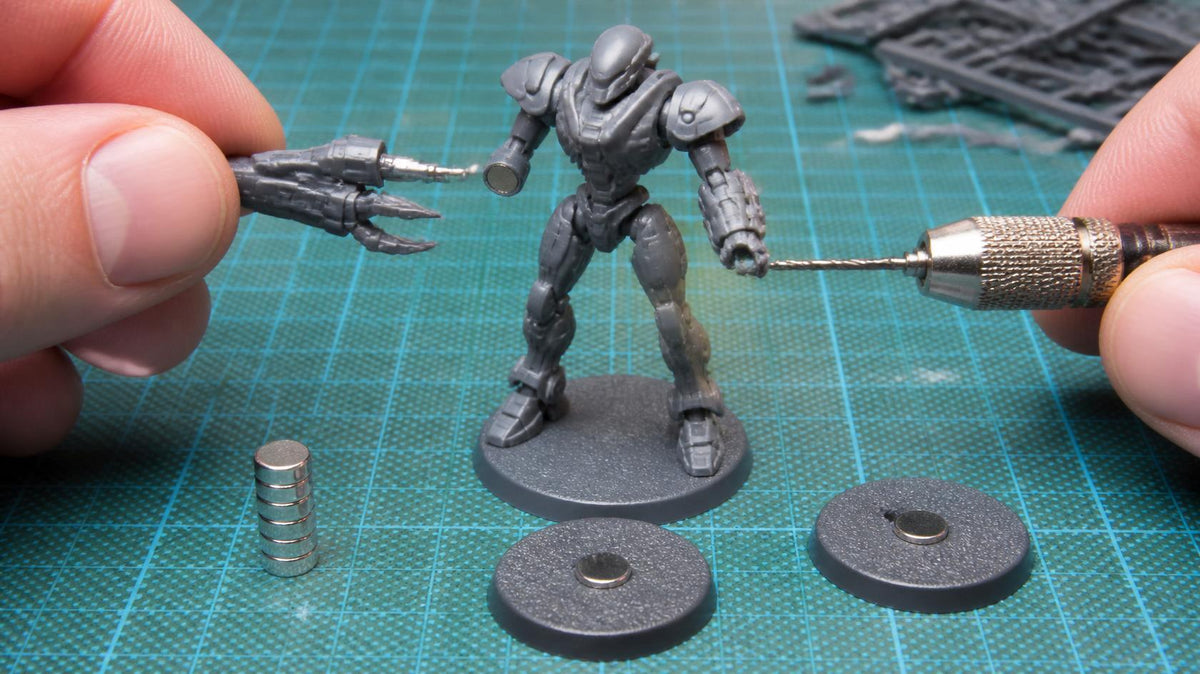
Magnetising sounds fiddly, but it's one of the most useful hobby skills you can learn. Put magnets in the right places and one model can carry several weapon options, a tank can swap turrets, and your painted army can travel to a game without a single model falling over.
This guide uses three products from the Warhaus range that work together: N52 Magnets, the Hobby Drill and the Figure Case.
Why Magnetise?
- Weapon swaps. Build one model and change its loadout between games, instead of buying and painting several.
- Transport. A magnet under each base holds models in place on a metal tray, so nothing slides into anything else.
- Storage and display. Big models can come apart into sections that are easier to store and move.
Which Magnet Size Goes Where
The Warhaus N52 range comes in 5×2mm, 3×1mm and 2×1mm sizes. N52 is one of the strongest grades of neodymium, so even small magnets hold well.
| Size | Use it for |
|---|---|
| 5×2mm | Bases for transport, vehicle turrets, large weapons, monster parts |
| 3×1mm | Infantry weapons, backpacks, shoulder pads |
| 2×1mm | Small arms, hands and anything with very little room |
If you're not sure what you'll need, the mixed packs give you all three sizes to start with.
Tools You'll Need
- A pin vice or hobby drill. The Warhaus Hobby Drill is hand-powered, which gives you far more control on small plastic parts than a power drill. It takes bits with a 3.0mm or 3.175mm shank. Bits aren't included.
- Drill bits matching your magnet diameters.
- Super glue (cyanoacrylate) or two-part epoxy.
- A hobby knife for cleaning up holes.
- A marker or a dab of paint for keeping track of polarity.
How to Fit a Magnet
- Dry-fit first. Hold the part in place and decide exactly where both magnets will meet.
- Drill a pilot hole with a small bit, then step up to the magnet's size. Go slowly and let the drill do the work. Too much pressure snaps micro bits.
- Check the depth. The magnet should sit flush with the surface or very slightly below it.
- Glue the first magnet in and let it set.
- Get the polarity right. This is the step everyone gets wrong once. Let the second magnet snap onto the first one, mark the outward-facing side, then glue it in with that side facing out.
- Test before painting. Make sure the parts click together firmly and sit where they should.
Tip: stack all your magnets in one long column and mark the top of the whole stack. Every magnet then has its polarity marked the same way, and you can glue them in consistently across a whole army.
Magnetising for Transport
This is the easiest place to start. Glue a 5×2mm magnet into a hole drilled in the underside of each base, or into the recess most plastic bases already have.
The Warhaus Figure Case has metal trays, so magnetised bases snap straight onto them and stay put. No foam to cut, and no paint rubbed off in transit.
Common Mistakes
- Reversed polarity. Parts push apart instead of snapping together. Always test before the glue sets.
- Magnets too close together. Two magnets side by side in the same part will pull each other out of place.
- Drilling too deep. A magnet that sits too far down won't hold. Fill the hole slightly with putty and try again.
- Painting first. Do the magnets before you paint, so any glue slips don't ruin a finished model.
Start Small
Try magnetising a few bases first, then move on to a single weapon swap. Once you've got the polarity trick down, you'll start seeing places to put magnets on everything.
Find the magnets, drill and case in our Warhaus range, or bring a model into the shop at 22 Castlemaine Street, Kirwan, and we'll help you work out where the magnets should go.