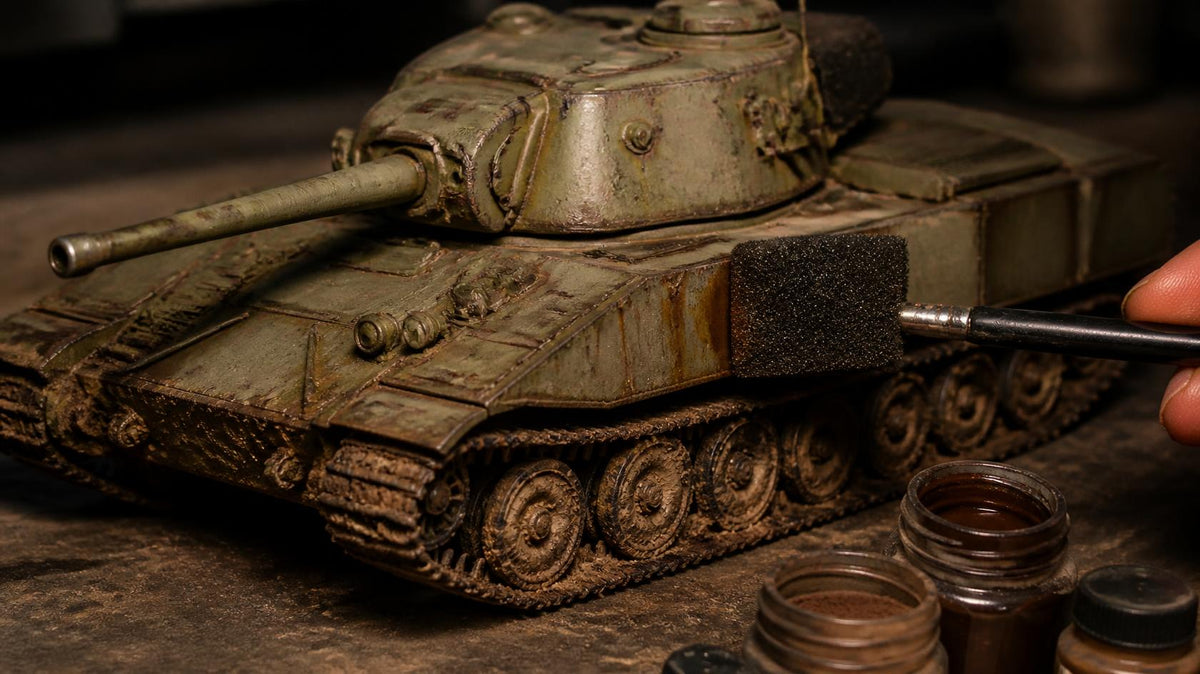
A freshly painted tank looks like it just rolled out of the factory. Real machines and armour pick up chips, scratches, rust, mud and grime, and adding a little of that is what makes a model look like it's actually been to war.
Weathering works on almost anything: tanks, mechs, power armour, scale model kits, terrain and even 3D printed props. The trick is to build it up in layers and know when to stop.
The Order We Use
- Chipping and scratches
- Washes and pin washes
- Streaking and rust
- Dust and mud
Each layer sits on top of the last, so working in this order keeps things looking natural.
1. Chipping With a Sponge
Sponge chipping is the fastest way to add realistic paint damage.
- Tear off a small piece of foam. The packing foam from a blister pack works perfectly.
- Dab it in a dark brown or gunmetal paint, then dab most of it off on a paper towel.
- Lightly touch it onto edges, corners and places that would take wear: hatches, steps, the front of armour plates, weapon barrels.
The Warhaus Sponge Grip holds the foam for you, which gives you much more control and keeps paint off your fingers.
Less is more. Chips should cluster where wear makes sense, not cover the whole model evenly. For a sharper look, add a few fine scratches with a small brush.
2. Washes and Pin Washes
A wash darkens recesses and adds grime. A pin wash is the same thing, applied only into panel lines and around rivets with a fine brush, rather than over everything.
- SMS Washes come in black, dark brown, umber, olive and white for different effects.
- AK Interactive washes, including Extreme Rust Wash, are enamel-based. They flow beautifully and stay workable longer, so you can wipe back mistakes with a brush dampened with enamel thinner.
Enamel washes work best over a sealed acrylic finish. A coat of gloss varnish first helps them flow into the lines instead of staining the flat surfaces.
3. Streaking and Rust
Rain, oil and rust run down vertical surfaces over time. Recreating that sells the idea that a vehicle has been sitting outside.
- Dot a little rust or grime colour under rivets and edges, then pull it straight down with a clean, slightly damp brush.
- AMMO Streakingbrushers are made for this and are very forgiving.
- For heavy, crusty rust, Citadel's Typhus Corrosion from the Technical range adds gritty texture, then a touch of orange-brown on top brings it to life.
4. Dust and Mud
The lowest parts of a vehicle pick up the most dirt: tracks, wheels and lower hull.
- A light drybrush of a sandy colour on the lower edges reads instantly as dust.
- Pigments, like AK's liquid pigments, add a soft, chalky layer of dust or rust.
- For thick mud, mix a texture paint with a brown wash and stipple it on.
Filters: Pulling It Together
A filter is a very thin, transparent layer of colour over the whole model. It tones everything down and blends the weathering into the base colour. AMMO acrylic filters are an easy way to try it.
Tips
- Look at real things. Photos of real tanks, trucks and machinery show you where wear actually happens.
- Stop early. It's much easier to add more weathering than to take it away.
- Varnish at the end. A matt varnish locks everything in and kills any unwanted shine.
- Practise on terrain first. It's forgiving, and it takes weathering beautifully. See our terrain guide.
Find the Gear
Browse our full Weathering & Effects range, or drop into the shop at 22 Castlemaine Street, Kirwan, to see weathered models up close.
A heads-up for overseas customers: enamel washes and thinners are solvent-based, so they count as dangerous goods and we can only ship them within Australia. Our dangerous goods guide explains why.